To continue the Windows Azure Pack series, here is my next topic: Installing and Configuring Service Provider Foundation
If you missed other parts of the series, check links below:
Part 1 – Understanding Windows Azure Pack
Part 2 – Understanding Windows Azure Pack – Deployment Scenarios
Part 3 – Understanding Windows Azure Pack – How to guide with Express Edition on Nutanix – Environment Requirements
There are 2 main steps to deploying WAP (Windows Azure Pack) on Nutanix:
- Deploying SPF (Service Provider Foundation) – This blog post
- Deploying Windows Azure Pack (coming soon)
Service Provider Foundation
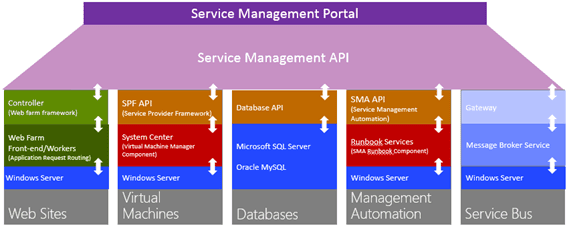
SPF is provided with System Center 2012 – Orchestrator, a component of System Center 2012 R2. SPF exposes an extensible OData web service that interacts with System Center Virtual Machine Manager (SCVMM). This enables service providers and hosters to design and implement multi-tenant self-service portals that integrate IaaS (Infrastructure as a Service) capabilities available on System Center 2012 R2. The following picture shows how System Center w/SPF interacts with WAP to provide VM Cloud Services (see TechNet article for more info):
 As with every installation, SPF requires additional software, features and server roles. Setup wizard checks prerequisites and reports about their status. Unfortunately, there is no “button” to install all of requirements automatically. I’ve wrote a script to automate this process (see below). Please note: Don’t try to install SPF on the SCVMM Server. It’s not supported.
Requirements:
- SQL Server 2012 SP1 or higher instance (Already Deployed)
- OS – Windows Server 2012 R2 VM (Already Deployed)
- 2 CPU Cores
- 4 Gigs of RAM
- 100 Gig OS Drive
- Feature – Management OData Internet Information Services (IIS) Extension
- Feature – NET Framework 4.5 features, WCF Services, and HTTP Activation.
- Web Server (IIS) server. Include the following services:
Basic Authentication
Windows Authentication
Application Deployment ASP.NET 4.5
Application Development ISAPI Extensions
Application Deployment ISAPI Filters
IIS Management Scripts and Tools Role Service
- Downloads:
WCF Data Services 5.0 for OData V3
ASP.NET MVC 4
- Virtual Machine Manager 2012 R2 Console
- Certificates: self-signed (wizard creates one automatically) or obtained SSL-certificate (recommended for production)
This script will install all requirements except SCVMM console (please note that SCVMM console has to be installed manually):
#IIS + Process activation model
Install-WindowsFeature Web-Asp-Net45,Web-Scripting-Tools,Web-Basic-Auth,Web-Windows-Auth,NET-WCF-Services45,Web-ISAPI-Ext,Web-ISAPI-Filter,Web-Scripting-Tools,WAS-Process-Model,WAS-Config-APIs,ManagementOdata
#Download and install WcfDataServices and AspNetMVC4
New-Item C:SPFRequirements -ItemType Directory
Invoke-WebRequest http://download.microsoft.com/download/8/F/9/8F93DBBD-896B-4760-AC81-646F61363A6D/WcfDataServices.exe -OutFile C:SPFRequirementswcfdatasvc.exe
Invoke-WebRequest http://download.microsoft.com/download/2/F/6/2F63CCD8-9288-4CC8-B58C-81D109F8F5A3/AspNetMVC4Setup.exe -OutFile C:SPFRequirementsaspnetmvc.exe
Set-Location C:SPFRequirements
.aspnetmvc.exe /quiet
Wait-Process aspnetmvc
.wcfdatasvc.exe /quiet
Wait-Process wcfdatasvc
Write-Host “All prerequisites are installed. Insert your SCVMM 2012 R2 DVD and install SCVMM Console manually. Then your environment will be ready for SPF installation“
Required user accounts
We need to create a domain user account for the Service Provider Foundation application pools and a domain group that will be used for the permissions on the individual virtual directories created by the installer.
In my test lab I have created the following domain service accounts. They do not need any special rights other than domain users group.
- spfadmnsvc – SPF Admin Web Service
- spfprovsvc – SPF Provisioning Web Service
- spfusagesvc – SPF Provisioning Web Service
And the following domain group
- SPF_Admins – Group for SPF Administrators – Add all your WAP admins to this gorup
This admin group should be added to the local Administrators group on the SPF server.
Certificates
The Service Provider Foundation provides an extensible OData web service. Communications to this web service can and should be encrypted by SSL. SSL requires certificates. The Service Provider Foundation allows for self-singed certificates (for testing purposes) and certificates issued by a standalone Certificate Authority, an enterprise Certificate Authority or a public Certificate Authority. The Service Provider Foundation install defaults to self-signed (wizard creates one automatically) or you can obtain a certificate from a Public CA for production.
Installation
The Service Provider Foundation setup is on the System Center Orchestrator R2 media.
When installing, login to the SPF server as a user that has DBO/SA rights to the SQL 2012 instance that will be hosting SPF databases.
Mount ISO with Orchestrator and run SetupOrchestrator.exe and click on “Service Provider Foundation”
Click Install
Accept license terms and click Next
We’ve already installed all prerequisites using my script, so just click Next
Define SQL Server 2012 SP1 Instance Name , Port Number and click Next. If you unable to reach SQL Server you have to
open firewall ports (
https://support.microsoft.com/kb/968872) or
check SQL TCP propertiesChoose certificate type (For test lab, use self-signed and can be changed out later) and click
Next

Define application pool credentials (spfadminsvc) and SPF_Admin Group that will have an access to SPF services and click Next. It’s best practices to create new domain accounts for every SPF services instead of using Network Service account.

Provider Web Service properties , click Next

Usage Web Service configuration, click Next

Windows updates + CEIP – yes (Microsoft needs your feedback 🙂 ), click Next

Click Install

Setup is complete!

Update SPF with the latest rollup (https://support.microsoft.com/en-us/kb/3021802) or use Windows Update.
Please note, the latest roll-up causing an issue in IIS and breaks SPF Web from working. I ran into this during my lab deployment. Check out this blog post on “System Center 2012 R2 : Update Rollup 4 breaks the SPF website” that fixes the issue.
This completes the SPF install. In a future blog post, we will be integrating SPF with WAP and SCVMM.
Additional links:
http://technet.microsoft.com/en-us/library/jj642895.aspx
http://technet.microsoft.com/en-us/library/dn266007.aspx
Next up in my series, Installing the Windows Azure Pack on Nutanix
Until next time, Rob….

 So, you ask, why Product Management? It’s been a lifelong dream to be part of shaping the direction of a technology solution. By joining 5nine, I hope to simplify IT, Cloud and beyond, because there’s always a better way 🙂


 As with every installation, SPF requires additional software, features and server roles. Setup wizard checks prerequisites and reports about their status. Unfortunately, there is no “button” to install all of requirements automatically. I’ve wrote a script to automate this process (see below). Please note: Don’t try to install SPF on the SCVMM Server. It’s not supported.


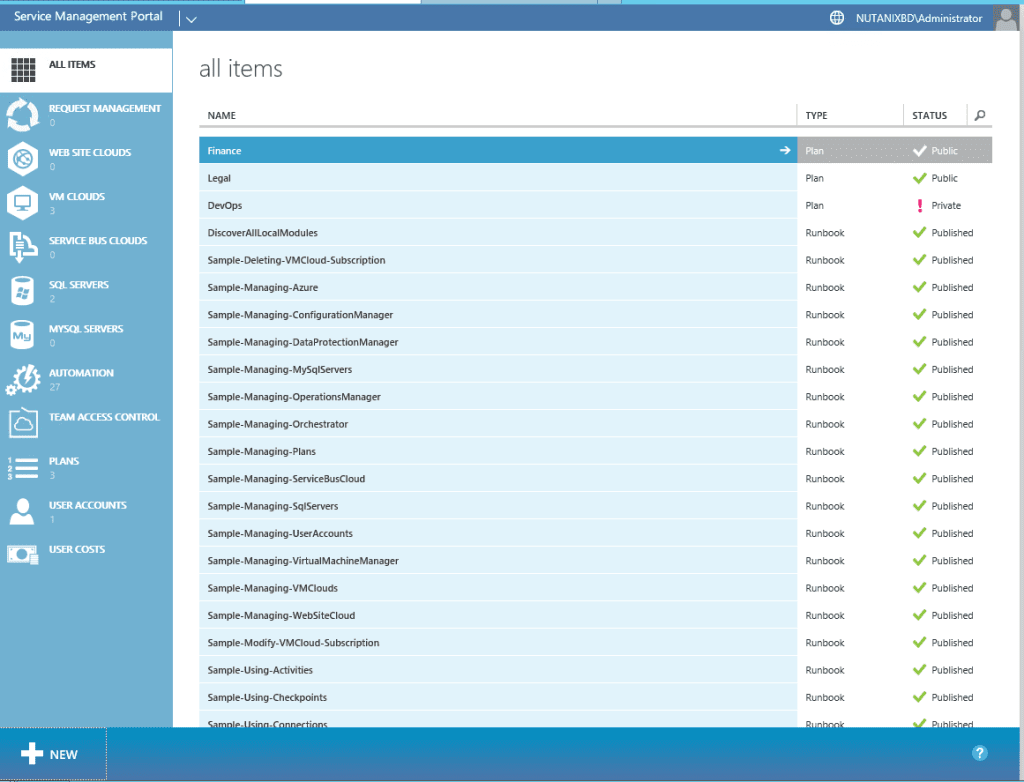 Admin Portal
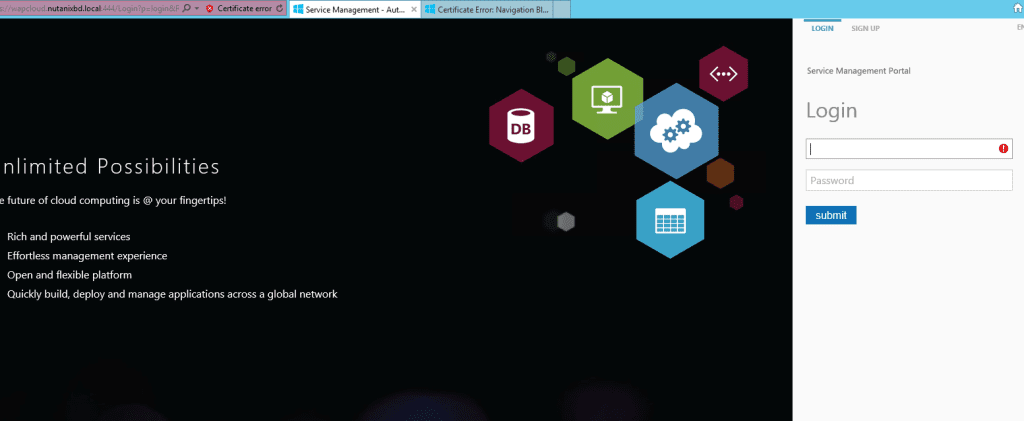 User Signin Portal
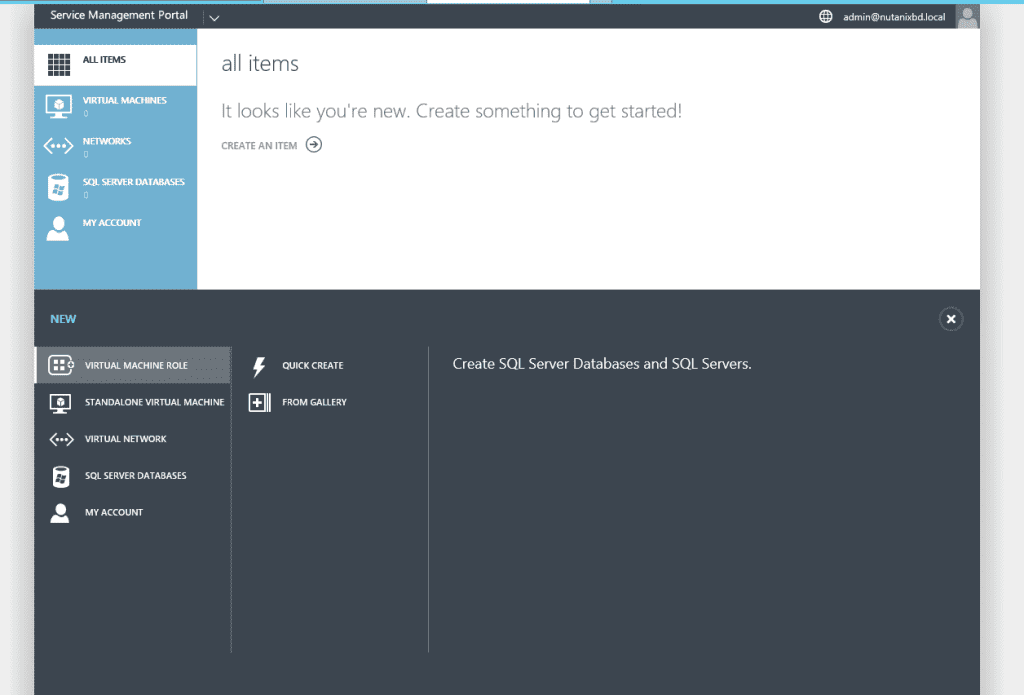 User Main Portal