
Estimated reading time: 3 minutes
 Thank you for reading this post, don't forget to subscribe! Happy New Year 2024!
In my various blog series, you need a SQL 2012 server setup for hosting databases with different Microsoft Solutions. Testing out on a SQL AlwaysOn AG will give you a feel of a real world scenario.
If you want to understand SQL 2012 Always-On Availability Group, check my blog post on SQL 2012 AlwaysON Feature – What is it? How does it work?.
To learn more about SQL Server on Nutanix Check out the Microsoft SQL Server on Nutanix Best Practices!
To give credit, most of the content was taken from Steve Poitras’s blog. He did a series on Configuring SQL Server on VMware ESXi that is awesome and I altered it for Hyper-V and added more details for installing.
In the following blog post, I’ll go over how to install and configure a test lab Microsoft SQL Server AlwaysOn AG with Hyper-V on Nutanix.
There are 4 parts:
- Windows Server 2012 R2 Failover Cluster Configuration – Part 1 – This blog post
- SQL 2012 Install with SP3 – Part 2 – coming soon
- SQL Server AlwaysOn AG Configuration – Part 3 – coming soon
- Adding Databases to a AlwaysOn AG – Part 4 – coming soon
Requirements:
- Two identical virtual machines with Windows Server 2012 R2 installed
- Administrative Accounts have been created
- Domain Admin account for install
- SQL Server Account
- SQL Agent Account
- Storage has been allocated and assigned as follows:
- 2 disks for SQL Database storage – 1 drive per server, for Always On AG
- Both disks should be assigned the same drive letter on both machines
- IP Address reserved for AG Listener
- SMB file share on a Nutanix cluster used for Quorum
- Failover Cluster Feature is installed on both machines
Windows Server 2012 R2 Failover Cluster Installation
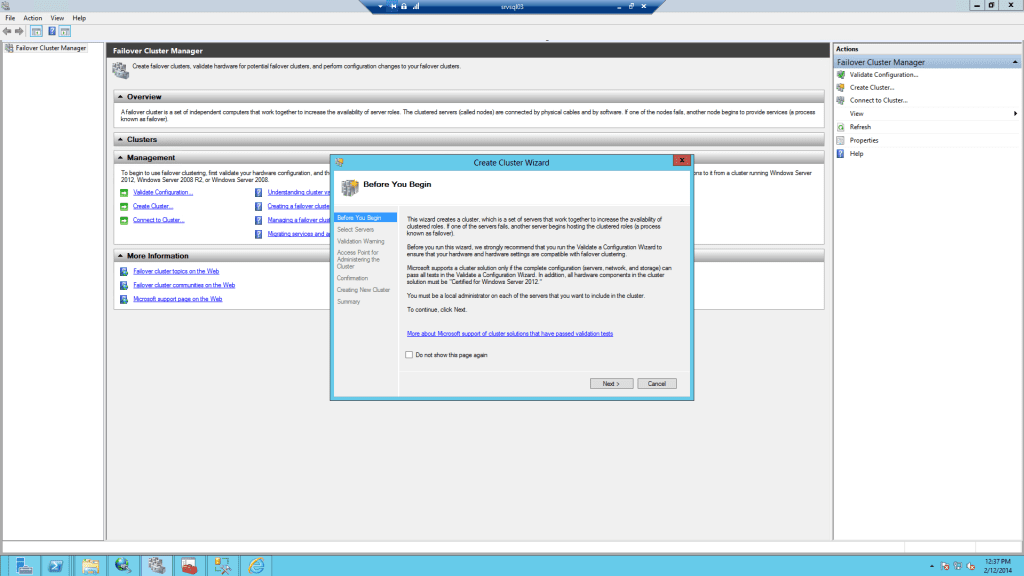
In Server Manager, Select Tools, Failover Cluster Manager. In Failover Cluster Manager select Create Cluster
Click Next
Browse or enter the Server Name for both Servers to be added to the Cluster and Click Add
The servers for the cluster will be shown below, click Next
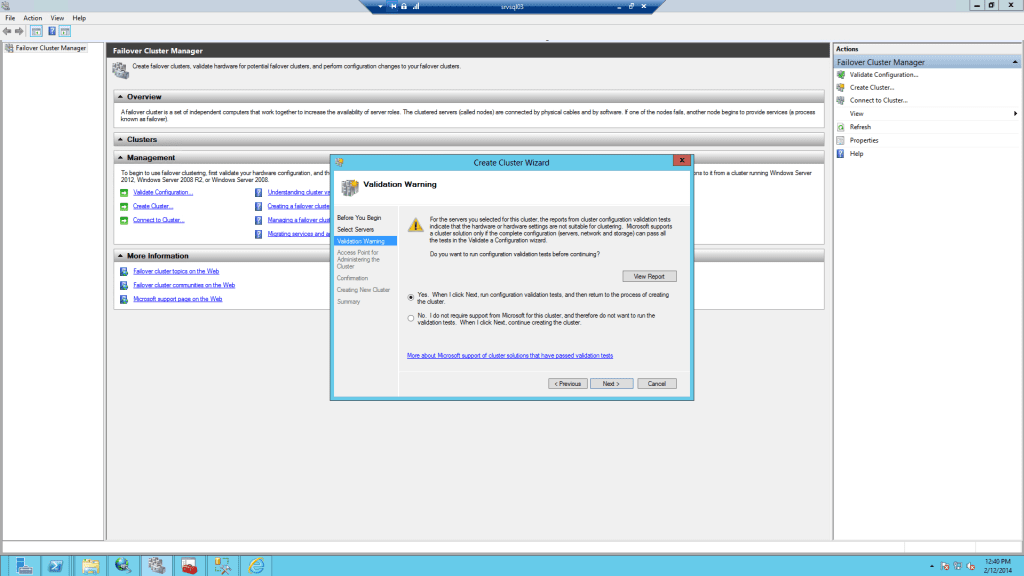
Select Yes to run the cluster validation, and click Next
 Click Next
Select Run all tests… and click Next
Click Next
If some tests fail check the failed tests by clicking on View Report. In my example these servers are both mounting NDFS locally using the private IP (192.168.5.2) which gave a duplicate IP error message. This can be ignored.
Click Finish
Type in a Cluster Name and click Next. NOTE: the Cluster Name should be less than 15 characters for NETBIOS
Un-check Add eligible storage to the cluster and click Next. Since we’re using a file share based quorum we don’t need to add any storage to the cluster. If we were using iSCSI we could add the iSCSI LUN to the cluster for the quorum
Click Finish
Right click on the Cluster and navigate to ‘Configure Cluster Quorum Settings…’