Hi Everyone…I love to show off the cool Microsoft integrations that Nutanix has and most recently Nutanix released System Center Virtual Machine Manager (SCVMM) 2012 R2 Fast Clones plug-in.
With NOS 4.1.3, Nutanix has released a Fast Clone plugin for SCVMM. The plug-in has the ability to provide space efficient, low impact clones from SCVMM and quickly. The plugin is a wrapper around Nutanix powershell commands for Fast Cones. The plugin does need proper access rights to the Hyper-V hosts and SCVMM and already should be setup for most environments that have Nutanix with Hyper-V deployed. You will need to install the plugin on the SCVMM host along with the Nutanix powershell command-lets.
Once you have the SCVMM Fast Clones plug-in installed, you can start creating Fast Clones right away. Installation is quick and easy and creating clones is just as easy as shown below.
To create VM clones using the Nutanix Fast Clones wizard, follow the below steps:
- Start the SCVMM
- Navigate to the Nutanix hosts.
- Select a host and then select the VM to be cloned.
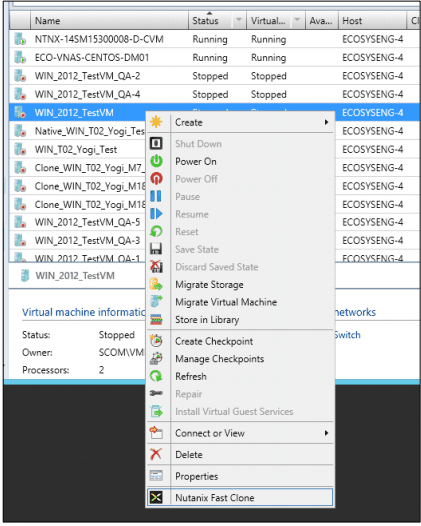
- To invoke the wizard, do one of the following: Click the “Nutanix Fast Clone” button on the top menu-bar. Right-click the target VM and select “Nutanix Fast Clone” from the pop-up context menu:

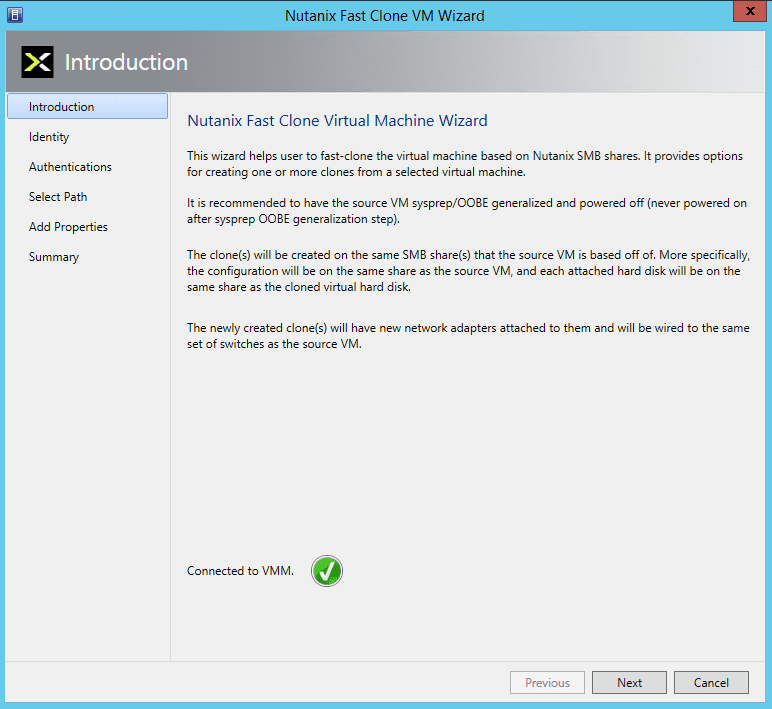
- In the Introduction screen, read the instructions and then click the “Next” button. NOTE: On start of the wizard, it makes a connection to the VMM to be able to communicate with it to run SCVMM PowerShell cmdlets to gather information about the selected VM.

- The “Identity” screen is displayed. The “Source VM Name” and “Source VM Host Name” is prepopulated, enter the following information and then click the “Next” button:
- Clone Type: Click the “Clone One Virtual Machine” radio button and enter a name for the clone when creating a single clone or click the “Clone Multiple Virtual Machines” radio button and enter the following information:
- VM Prefix Name: This is the root part of the new VM name.
- Beginning Suffix: a number to start the numbering of the new VMs
- Number of Clones: a number between 1 and 100.

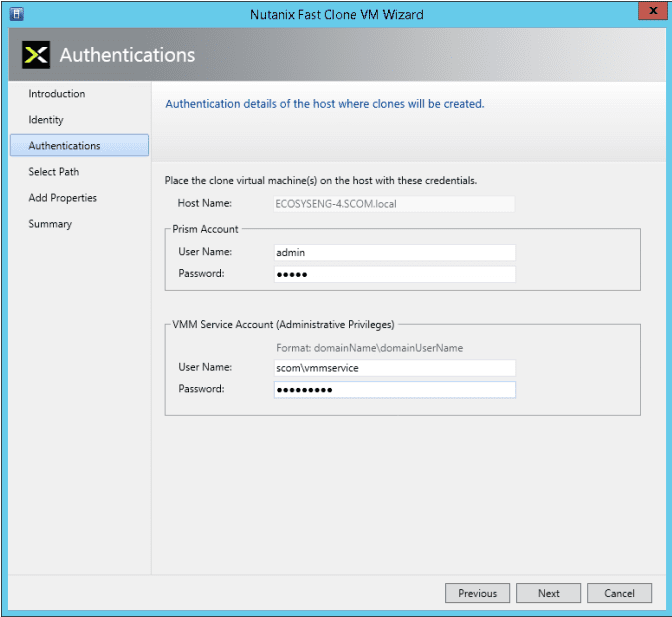
- In the Authentication screen, enter the Prism and VMM Service Account user names and passwords in the appropriate fields, and then click the “Next” button.

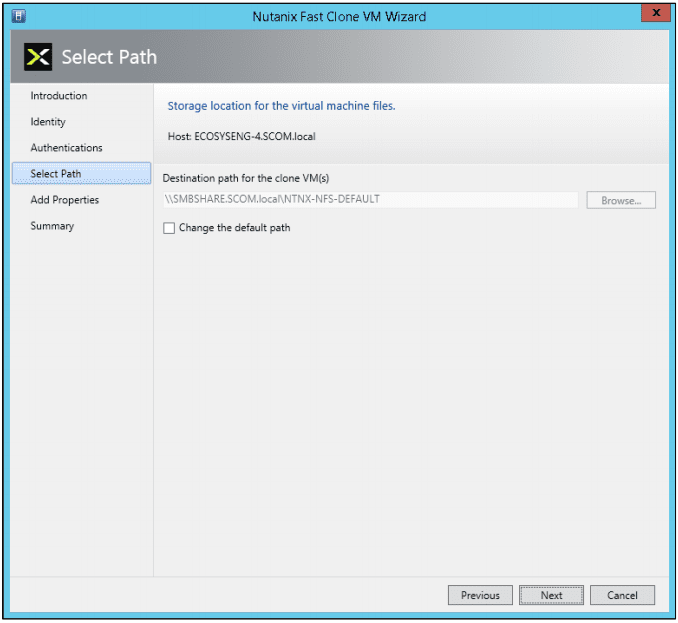
- In the “Select Path” screen, select the destination path and then click the “Next” button. Leave the default path “as is” or change it to a new path as needed by clicking the “Change the default path” box. Click the Browse button to select a destination path for the clone VMs. This is the path where virtual machine configuration files will be stored. The path must be on the same Nutanix SMB share as the VM configuration file.

- In the “Add Properties” screen, click the appropriate radio button to either power on or not power on the VMs after cloning and then click the “Next” button.

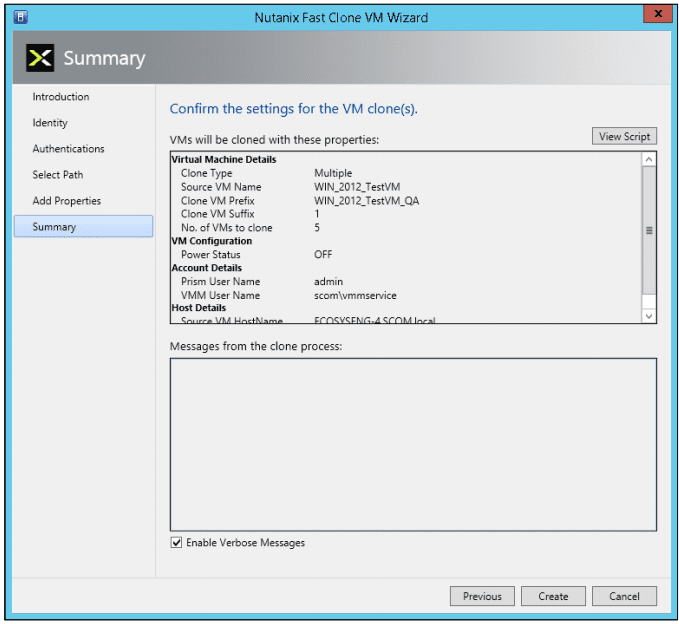
- In the Summary screen below, review (confirm) the settings are correct.

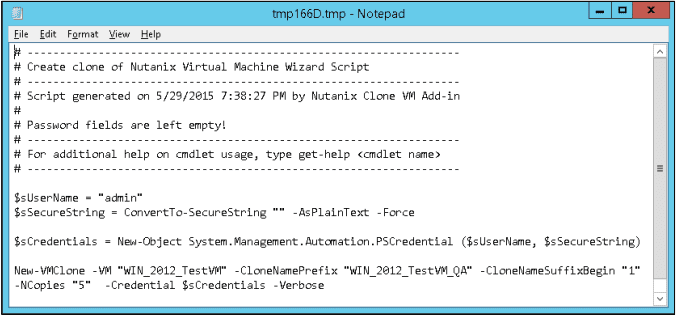
Clicking the “View Script” button displays the script to be executed:

Clicking the “Enable Verbose Messages” displays detailed log messages as the VMs are being created.
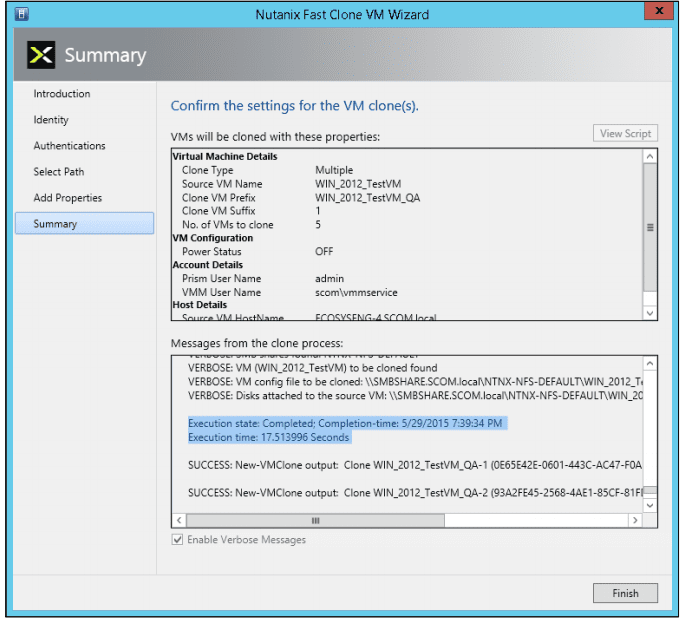
- When the settings are correct, click the “Create” button to create the cloned VM(s). An hour glass is displayed and progress messages are displayed.
- After the clones are created, click the Finish button to close the wizard and you just created VM’s at lighting speed.

If you want to check out Fast Clones for your environment, you can download Fast Clones from the Nutanix Portal at https://portal.nutanix.com.
Below is a demo video shows traditional cloning vs Fast Clones that my buddy created. It shows the awesome benefit of Fast Clones.
https://youtu.be/cWGEvjHZxdw
As always, if you have any questions please post a comment.
Until next time….Rob

